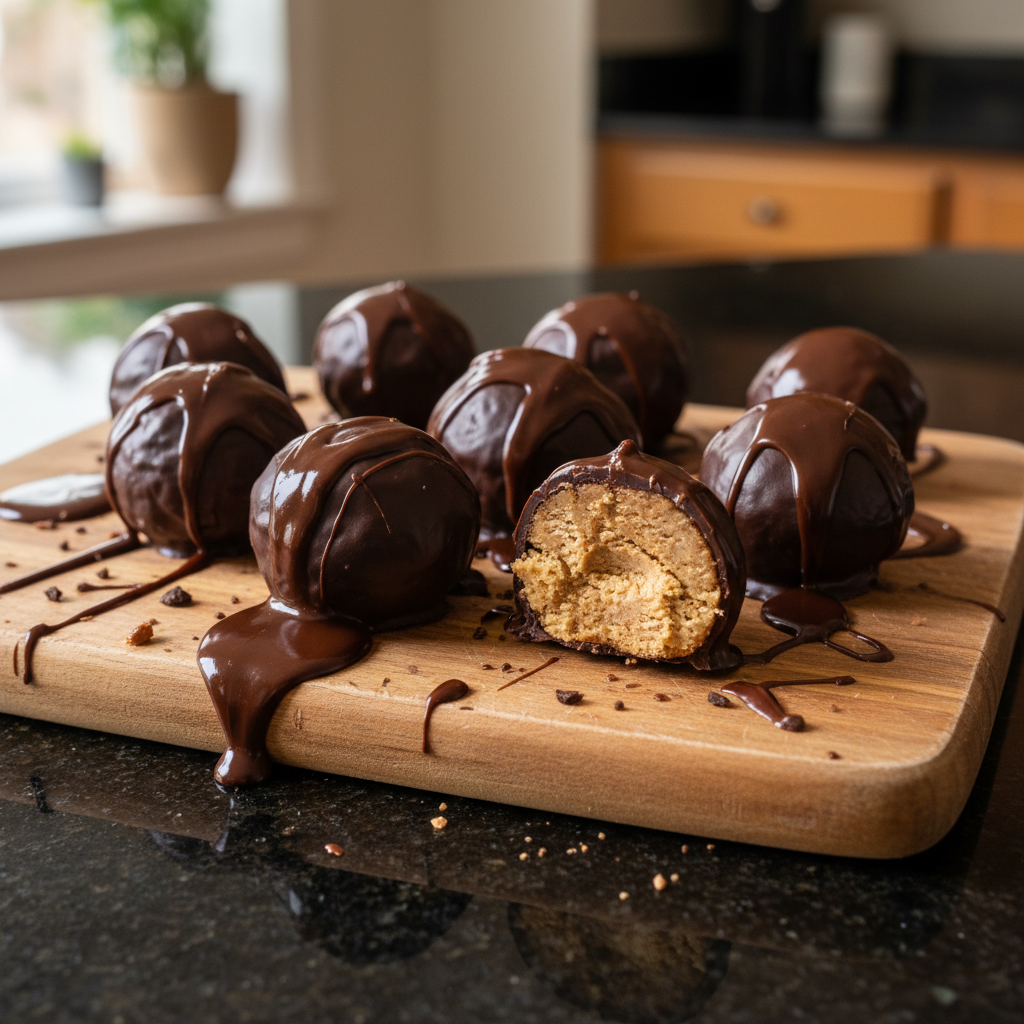
Divine Homemade Reese's Truffles
Highlighted under: Whisked Delight Recipes
I absolutely adore making these Divine Homemade Reese's Truffles! The dense, rich chocolate combined with that creamy peanut butter center creates a symphony of flavors that dance on your palate. Every time I make them, I’m reminded of the joy of sharing homemade treats with friends and family. The best part? They are surprisingly easy to whip up, making them a go-to dessert for any occasion. Whether you’re indulging yourself or bringing them to a gathering, these truffles never fail to impress.
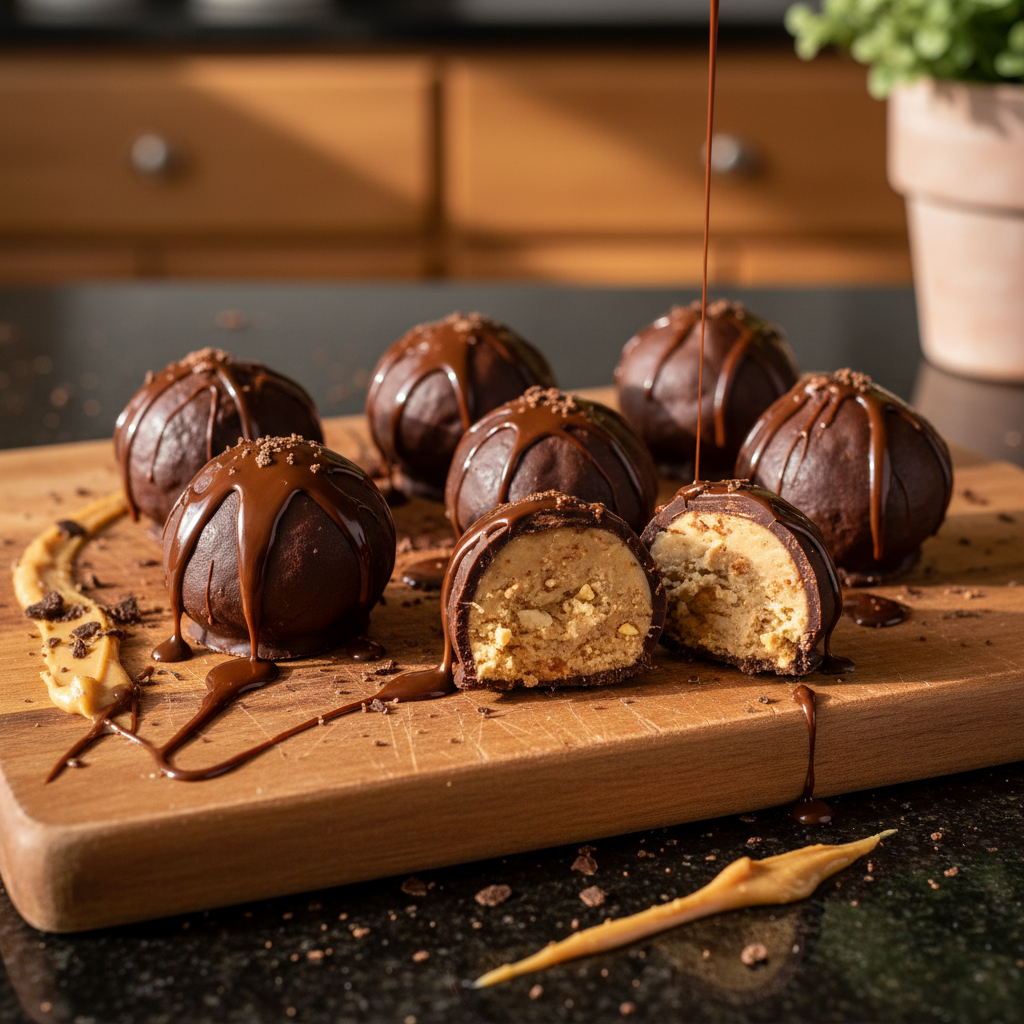
When I first tried making these Divine Homemade Reese's Truffles, I was pleasantly surprised by how straightforward the process was. The key to achieving that perfect creamy peanut butter filling lies in using a blend of confectioners' sugar and butter to create a smooth texture. I remember the first time I rolled them in chocolate; my kitchen smelled incredibly tempting, and I couldn't wait to share them with friends.
What I love most about this recipe is its versatility. You can top the truffles with crushed nuts or sprinkles for a fun twist. Each time I make these, I experiment with different coatings or flavorings, and they always turn out delightfully. Trust me, once you try these, they’ll become a staple in your sweet arsenal!
Why You'll Love These Truffles
- Rich chocolate flavor paired with creamy peanut butter
- Melts in your mouth with every bite
- Perfect for sharing or as a treat for yourself
The Art of Rolling Truffles
When it comes to rolling the truffles, a consistent size ensures even coating and a professional look. Using a small cookie scoop can help achieve uniform portions, typically about one inch in diameter. Having slightly dampened hands can also prevent the peanut butter mixture from sticking to your palms, creating a smoother surface on the truffles. After rolling, place them on a parchment-lined baking sheet, which makes it easy to transfer them to the fridge without sticking.
For an added touch, consider rolling the truffles in crushed nuts, graham cracker crumbs, or cocoa powder after coating them in chocolate. This not only enhances the presentation but also contributes different textures to the truffles. If you choose this route, roll them immediately after coating; otherwise, the chocolate will set and the toppings won’t adhere.
Chocolate Coating Insights
The key to achieving a glossy chocolate coating is to ensure the chocolate is properly melted and not overheated. Microwaving in 30-second intervals is highly effective; stir in between each interval to maintain control. If you notice the chocolate clumping or seizing, a small splash of vegetable oil can help restore its smoothness. Coconut oil is an excellent option here, not only smoothing out the chocolate but also lending a subtle flavor that complements the rich peanut butter center.
If you prefer a thinner chocolate shell, you can add more coconut oil to the melting chocolate. On the contrary, for a thicker coating, simply reduce the amount of coconut oil used or eliminate it altogether. This adjustability means you can customize your truffles’ finish based on your texture preferences!
Storage and Make-Ahead Tips
To keep your Divine Homemade Reese's Truffles in pristine condition, store them in an airtight container in the refrigerator. They will keep well for up to two weeks, which makes them an ideal make-ahead treat. If you plan to freeze them, arrange the coated truffles on a baking sheet lined with parchment paper and freeze until solid, then transfer them to a freezer-safe bag. Properly stored, they can last for up to three months, maintaining both flavor and texture.
Thaw frozen truffles in the refrigerator for a few hours before serving, as this gradual thawing helps preserve their creamy interior. For an indulgent treat, consider letting them sit at room temperature for 15-20 minutes before enjoying; this will soften the chocolate coating slightly and enhance the overall eating experience.
Ingredients
For the Peanut Butter Filling
- 1 cup creamy peanut butter
- 1 1/2 cups confectioners' sugar
- 1/4 cup unsalted butter, softened
- 1 teaspoon vanilla extract
For the Chocolate Coating
- 2 cups semi-sweet chocolate chips
- 1 tablespoon coconut oil (optional, for smooth coating)
These ingredients combine to create the most indulgent truffles.
Instructions
Make the Peanut Butter Filling
In a mixing bowl, combine the creamy peanut butter, confectioners' sugar, softened butter, and vanilla extract. Mix well until smooth and fully incorporated. Refrigerate the mixture for about 15 minutes to make it easier to handle.
Form the Truffles
Once chilled, scoop small portions of the peanut butter mixture and roll them into balls, about 1 inch in diameter. Place the formed truffles on a baking sheet lined with parchment paper.
Melt the Chocolate
In a microwave-safe bowl, melt the semi-sweet chocolate chips along with the coconut oil, if using. Heat in 30-second intervals, stirring in between, until smooth and fully melted.
Coat the Truffles
Dip each peanut butter ball into the melted chocolate, ensuring it's fully coated. Use a fork to lift the truffle out and let any excess chocolate drip off. Return the coated truffles to the parchment-lined baking sheet.
Chill and Serve
Once all the truffles are coated, place the baking sheet in the fridge for about 30 minutes to allow the chocolate to set. Enjoy your Divine Homemade Reese's Truffles!
These truffles are best stored in an airtight container in the refrigerator.
Pro Tips
- For a decorative touch, sprinkle crushed peanuts or sea salt on top of the chocolate before it sets. You can also experiment with different flavors, such as adding a touch of sea salt to the peanut butter mixture for a sweet-salty flavor.
Ingredient Substitutions
If you’re looking to cater to dietary restrictions, consider swapping creamy peanut butter for alternatives like almond or cashew butter. These options also provide a delightful flavor twist. For the sugar component, you can use powdered erythritol or another sugar substitute if you need a low-sugar or keto-friendly version; just be sure to adjust the quantity since sugar substitutes often have different sweetness levels.
For those with dairy sensitivities, using dairy-free chocolate chips in the coating provides a rich flavor without the lactose. Additionally, you can use vegan butter instead of unsalted butter in the peanut butter filling to keep the recipe completely plant-based.
Serving Variations
To elevate the presentation, try drizzling white chocolate over the coated truffles for a beautiful contrast in color. You might even consider adding sea salt on top of the chocolate while it’s still warm for a delicious salty-sweet contrast. Another fun serving idea is to create an assorted truffle box by varying the fillings; think about adding crushed cookies or flavored extracts to the peanut butter mixture.
For a festive twist, during holidays, consider adding spices to the peanut butter filling, like cinnamon or nutmeg, or turning it into a peppermint variation using peppermint extracts. These small adjustments can transform the flavor profile and appeal of your truffles!
Questions About Recipes
→ Can I use crunchy peanut butter instead?
Yes, using crunchy peanut butter will add a delightful texture to the truffles!
→ How long can I store these truffles?
You can store them in an airtight container in the refrigerator for up to two weeks.
→ Can I freeze the truffles?
Absolutely! Just place them in a freezer-safe container, and they can last for up to three months.
→ What can I use instead of chocolate chips?
You may use melting chocolate or even white chocolate for a different flavor profile.
Divine Homemade Reese's Truffles
Created by: The Dishpark Team
Recipe Type: Whisked Delight Recipes
Skill Level: Easy
Final Quantity: 24 truffles
What You'll Need
For the Peanut Butter Filling
- 1 cup creamy peanut butter
- 1 1/2 cups confectioners' sugar
- 1/4 cup unsalted butter, softened
- 1 teaspoon vanilla extract
For the Chocolate Coating
- 2 cups semi-sweet chocolate chips
- 1 tablespoon coconut oil (optional, for smooth coating)
How-To Steps
In a mixing bowl, combine the creamy peanut butter, confectioners' sugar, softened butter, and vanilla extract. Mix well until smooth and fully incorporated. Refrigerate the mixture for about 15 minutes to make it easier to handle.
Once chilled, scoop small portions of the peanut butter mixture and roll them into balls, about 1 inch in diameter. Place the formed truffles on a baking sheet lined with parchment paper.
In a microwave-safe bowl, melt the semi-sweet chocolate chips along with the coconut oil, if using. Heat in 30-second intervals, stirring in between, until smooth and fully melted.
Dip each peanut butter ball into the melted chocolate, ensuring it's fully coated. Use a fork to lift the truffle out and let any excess chocolate drip off. Return the coated truffles to the parchment-lined baking sheet.
Once all the truffles are coated, place the baking sheet in the fridge for about 30 minutes to allow the chocolate to set. Enjoy your Divine Homemade Reese's Truffles!
Extra Tips
- For a decorative touch, sprinkle crushed peanuts or sea salt on top of the chocolate before it sets. You can also experiment with different flavors, such as adding a touch of sea salt to the peanut butter mixture for a sweet-salty flavor.
Nutritional Breakdown (Per Serving)
- Calories: 380 kcal
- Total Fat: 26g
- Saturated Fat: 15g
- Cholesterol: 195mg
- Sodium: 85mg
- Total Carbohydrates: 32g
- Dietary Fiber: 3g
- Sugars: 24g
- Protein: 6g